DIY Hurricane Window Protection in 6 Steps
When a storm is on the way, the best window protection is the one you can install quickly and correctly. Effective hurricane window protection is essential in areas prone to severe weather. For most homes, that means pre-cut plywood panels with labeled hardware, or a removable panel system you can mount in minutes. Security film adds a shatter-resistant layer but should be treated as a supplement, not your only defense. This guide shows three practical paths. Choose one or combine them based on your time, tools, and building codes. Consider adding hurricane window protection to your home improvement projects for increased safety during storm season.
Before you start, check local code and HOA rules, and confirm that your fasteners and edge clearances meet manufacturer or jurisdiction guidance. If any window is too high or unsafe to reach, plan professional help.
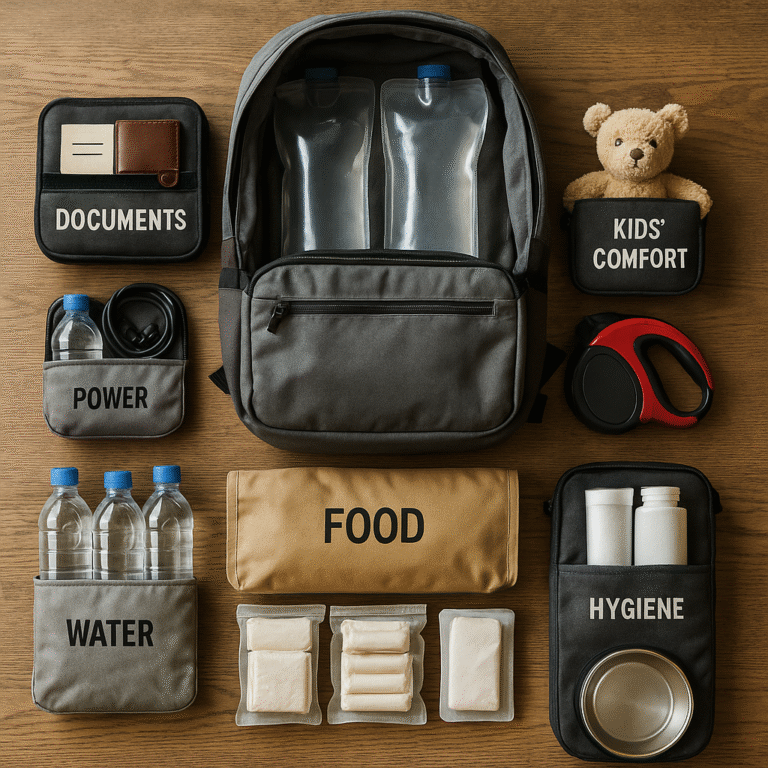
Tools & Materials
- Measuring & layout: tape measure, pencil, painter’s tape, square, marker for panel labels.
- Cutting & drilling: circular saw with plywood blade, clamped straightedge, drill/driver, countersink bit.
- Plywood route: 5/8″ exterior plywood (or 1/2″ minimum where allowed), corrosion-resistant screws or barrel bolts, washers, fender washers for masonry anchors.
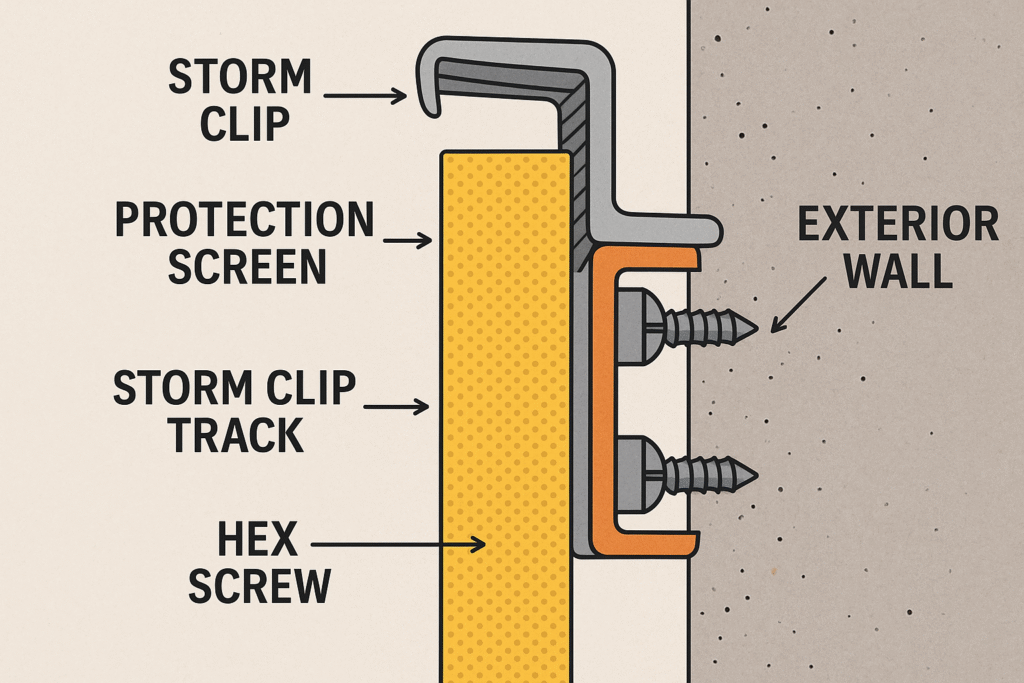
- Removable panel route (optional): panel mounting tracks or storm clips, machine screws/wing nuts per system, polycarbonate or aluminum panels if not using plywood.
- Film route (supplemental): safety/security window film kit, slip solution, squeegee, trim knife, lint-free cloths.
- Safety: eye and ear protection, work gloves, ladder with a helper, dust mask for cutting.
Steps
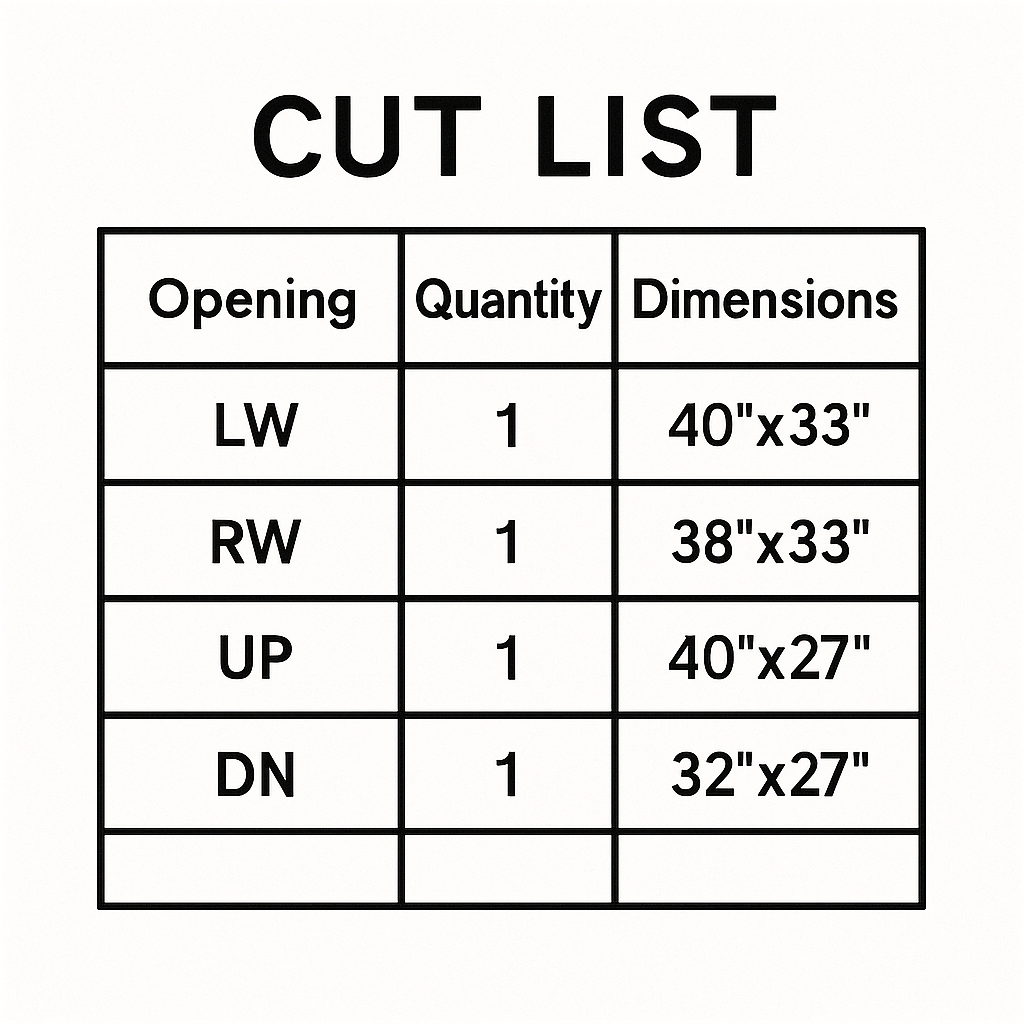
1) Measure, map, and label windows
Walk the exterior and list every opening you plan to protect. Measure width and height, and note the mounting surface (wood framing or masonry). Create simple IDs on painter’s tape (e.g., LR-1, BR-2) and stick them on the glass and on your cut list. Photograph each opening with its ID for a quick install reference. Organizing your tools ahead of time can streamline the process of installing hurricane window protection.
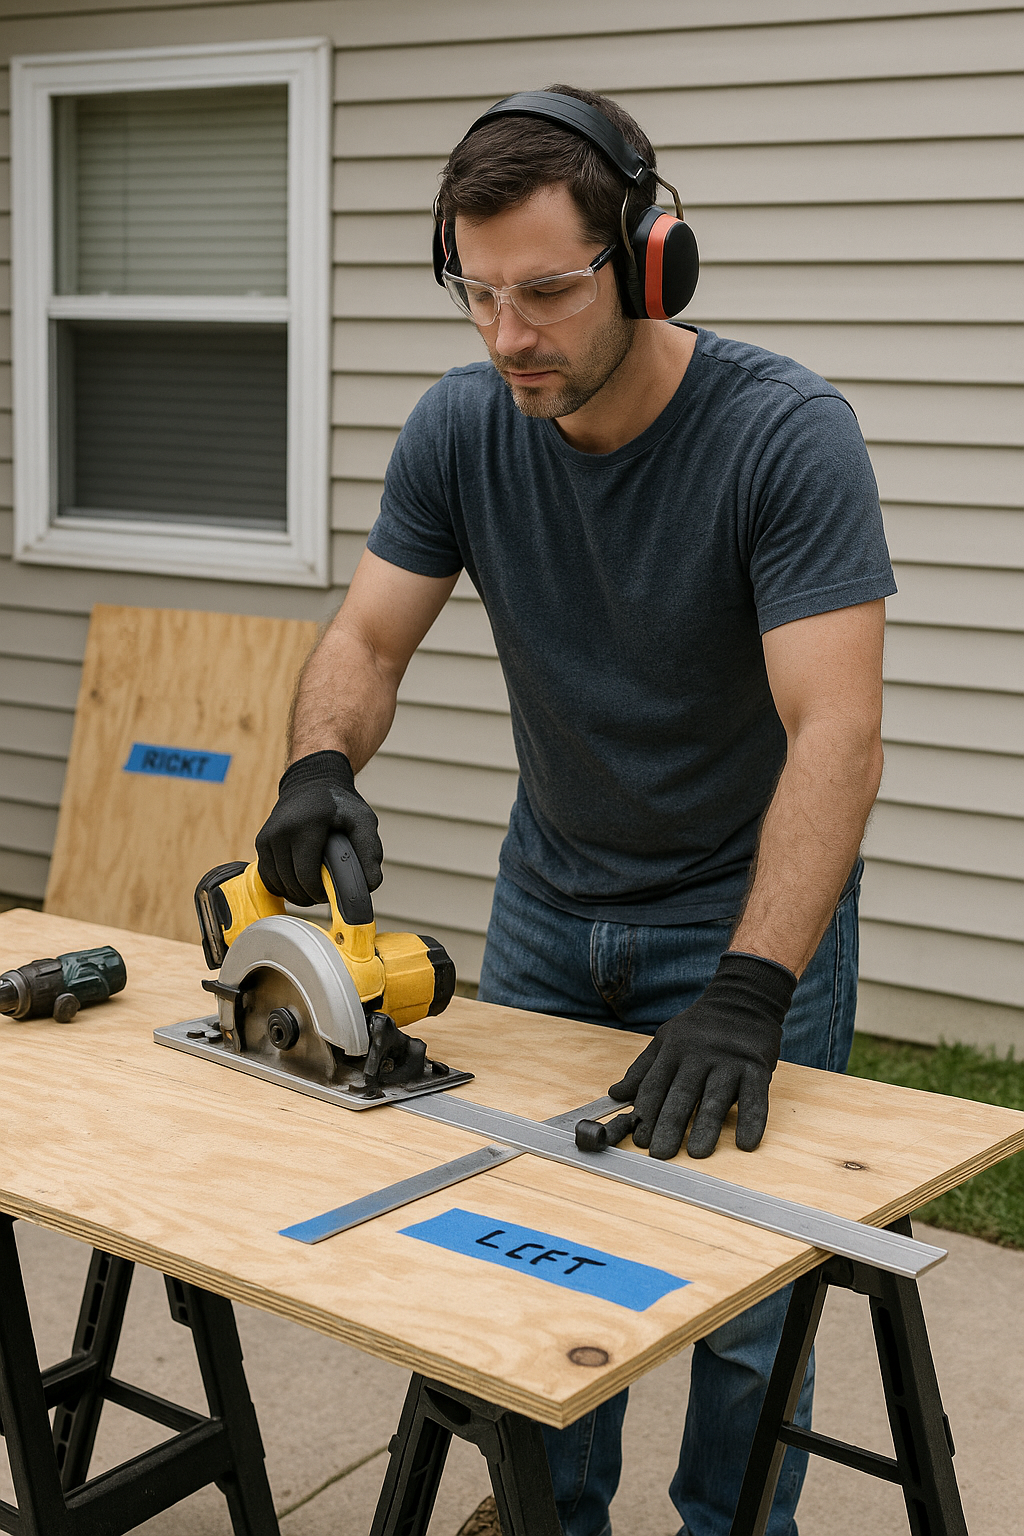
2) Cut and pre-fit plywood panels
Lay sheets on sawhorses and cut to size with a clamped straightedge. For wood framing, size panels to overlap the window trim by at least 1″–2″ on all sides. For masonry, match your anchor plan and allow the required edge distance. Lightly sand sharp edges. Hold each panel in place, confirm fit, and mark fastener positions.
3) Pre-drill, label, and store hardware
Pre-drill pilot holes in panels and, if allowed, pre-drill the substrate. Bag and label each set of screws/washers with the same ID as the panel. Store panels vertically near the install location so one person can move them safely. Label your panels for quick identification during installation of hurricane window protection.
4) Optional: install a removable panel system
If you prefer repeatable, fast installs, mount storm clips or tracks now. Dry-fit one panel to verify alignment and hardware length, then label the panel and hardware to match the opening. Using high-quality materials enhances the effectiveness of hurricane window protection.
5) Optional: apply safety/security film (supplement)
Film helps glass hold together under impact and reduces shards, but it does not replace structural protection. Clean glass thoroughly, apply slip solution, lay the film, squeegee out bubbles, and trim. Allow the full cure time before contact with water or cleaners.
6) Installation day sequence
Start on the windward side, then work around the home. Two people move faster and safer. Set each panel, drive fasteners just snug enough to seat the washers, and confirm that emergency exits remain usable if required by code. Keep the drill, bits, and extra screws in a belt pouch.
Safety notes
- Wear eye/ear protection and gloves while cutting and drilling.
- Use a helper for ladders and awkward panels. Do not lean panels against unstable surfaces.
- Verify fastener embedment and edge distance; overtightening can crack masonry or crush trim.
- Security film is supplemental; do not rely on film alone for windborne debris.
Troubleshooting
- Panel won’t seat flush: Check for trim high spots; lightly chamfer panel edges.
- Fasteners spin in wood: Step up to the next screw size or use a wood plug repair.
- Masonry anchors slip: Re-drill to the correct diameter and depth; vacuum dust before set.
- Film has bubbles: Re-squeegee from center to edges; large bubbles may require lift and re-wet.
Conclusion
Proper installation techniques are crucial for effective hurricane window protection. Pre-cut and labeled panels are the fastest reliable upgrade most households can make. If you want an even quicker repeat install, add a removable panel system. Apply film as a shatter-resistant layer, but back it with structural protection. Investing in hurricane window protection can save you time and money on repairs. With measurements, labels, and hardware bags ready, you can button up the house in an hour instead of a day.
Helpful Products


Frequently Asked Questions
Which thickness plywood should I use?
Many jurisdictions allow 1/2″, but 5/8″ exterior ply is a sturdier norm. Always follow local code.
Can I leave panels up long-term?
Remove them when the threat passes. Long exposure traps moisture and stresses fasteners.
Is film enough by itself?
Treat film as supplemental. Use panels or a rated system for impact protection.
What if a window is too high to reach safely?
Hire a pro. Roof-edge work and tall ladders are not DIY in storm prep.